Motion: making a sound evolve
Most living patches move over a single note. The sound starts one way, and by half a second it has changed: the filter opens, the detune widens, an oscillator swells in. Kiwisynth lets you author that movement where you already are, on the knob itself, and then see everything that moves on one Motion view.
Attach motion to a knob
Every modulatable knob carries a thin ring. Hover a knob that has nothing on it yet and the ring appears as a faint outline: that is the invitation to give the control movement. Click the ring (right-click works too) and a movement editor opens right on the knob. It is the one place to design how a control moves.
For the continuous oscillator and filter controls, the editor offers four ways to start:
- Swell: the value leaves the knob's setting, peaks, and returns to rest. Good for a filter that opens and closes again.
- Rise: the value climbs from the knob's setting and stays there for the rest of the note.
- Fall: the value drops from the knob's setting and stays there.
- Draw your own: a flat line you shape by hand.
The knob's position is always the resting value. The contour is added on top and returns to that value, so the knob keeps its plain meaning: turning it still sets where the sound sits at rest. You only give movement to the few controls you want to move; everything else stays still.
Draw the shape
Once a knob has a contour, the editor shows it as a curve on a horizontal centre line. The line is the resting value; the curve rises above it to open the control and dips below it to close it.
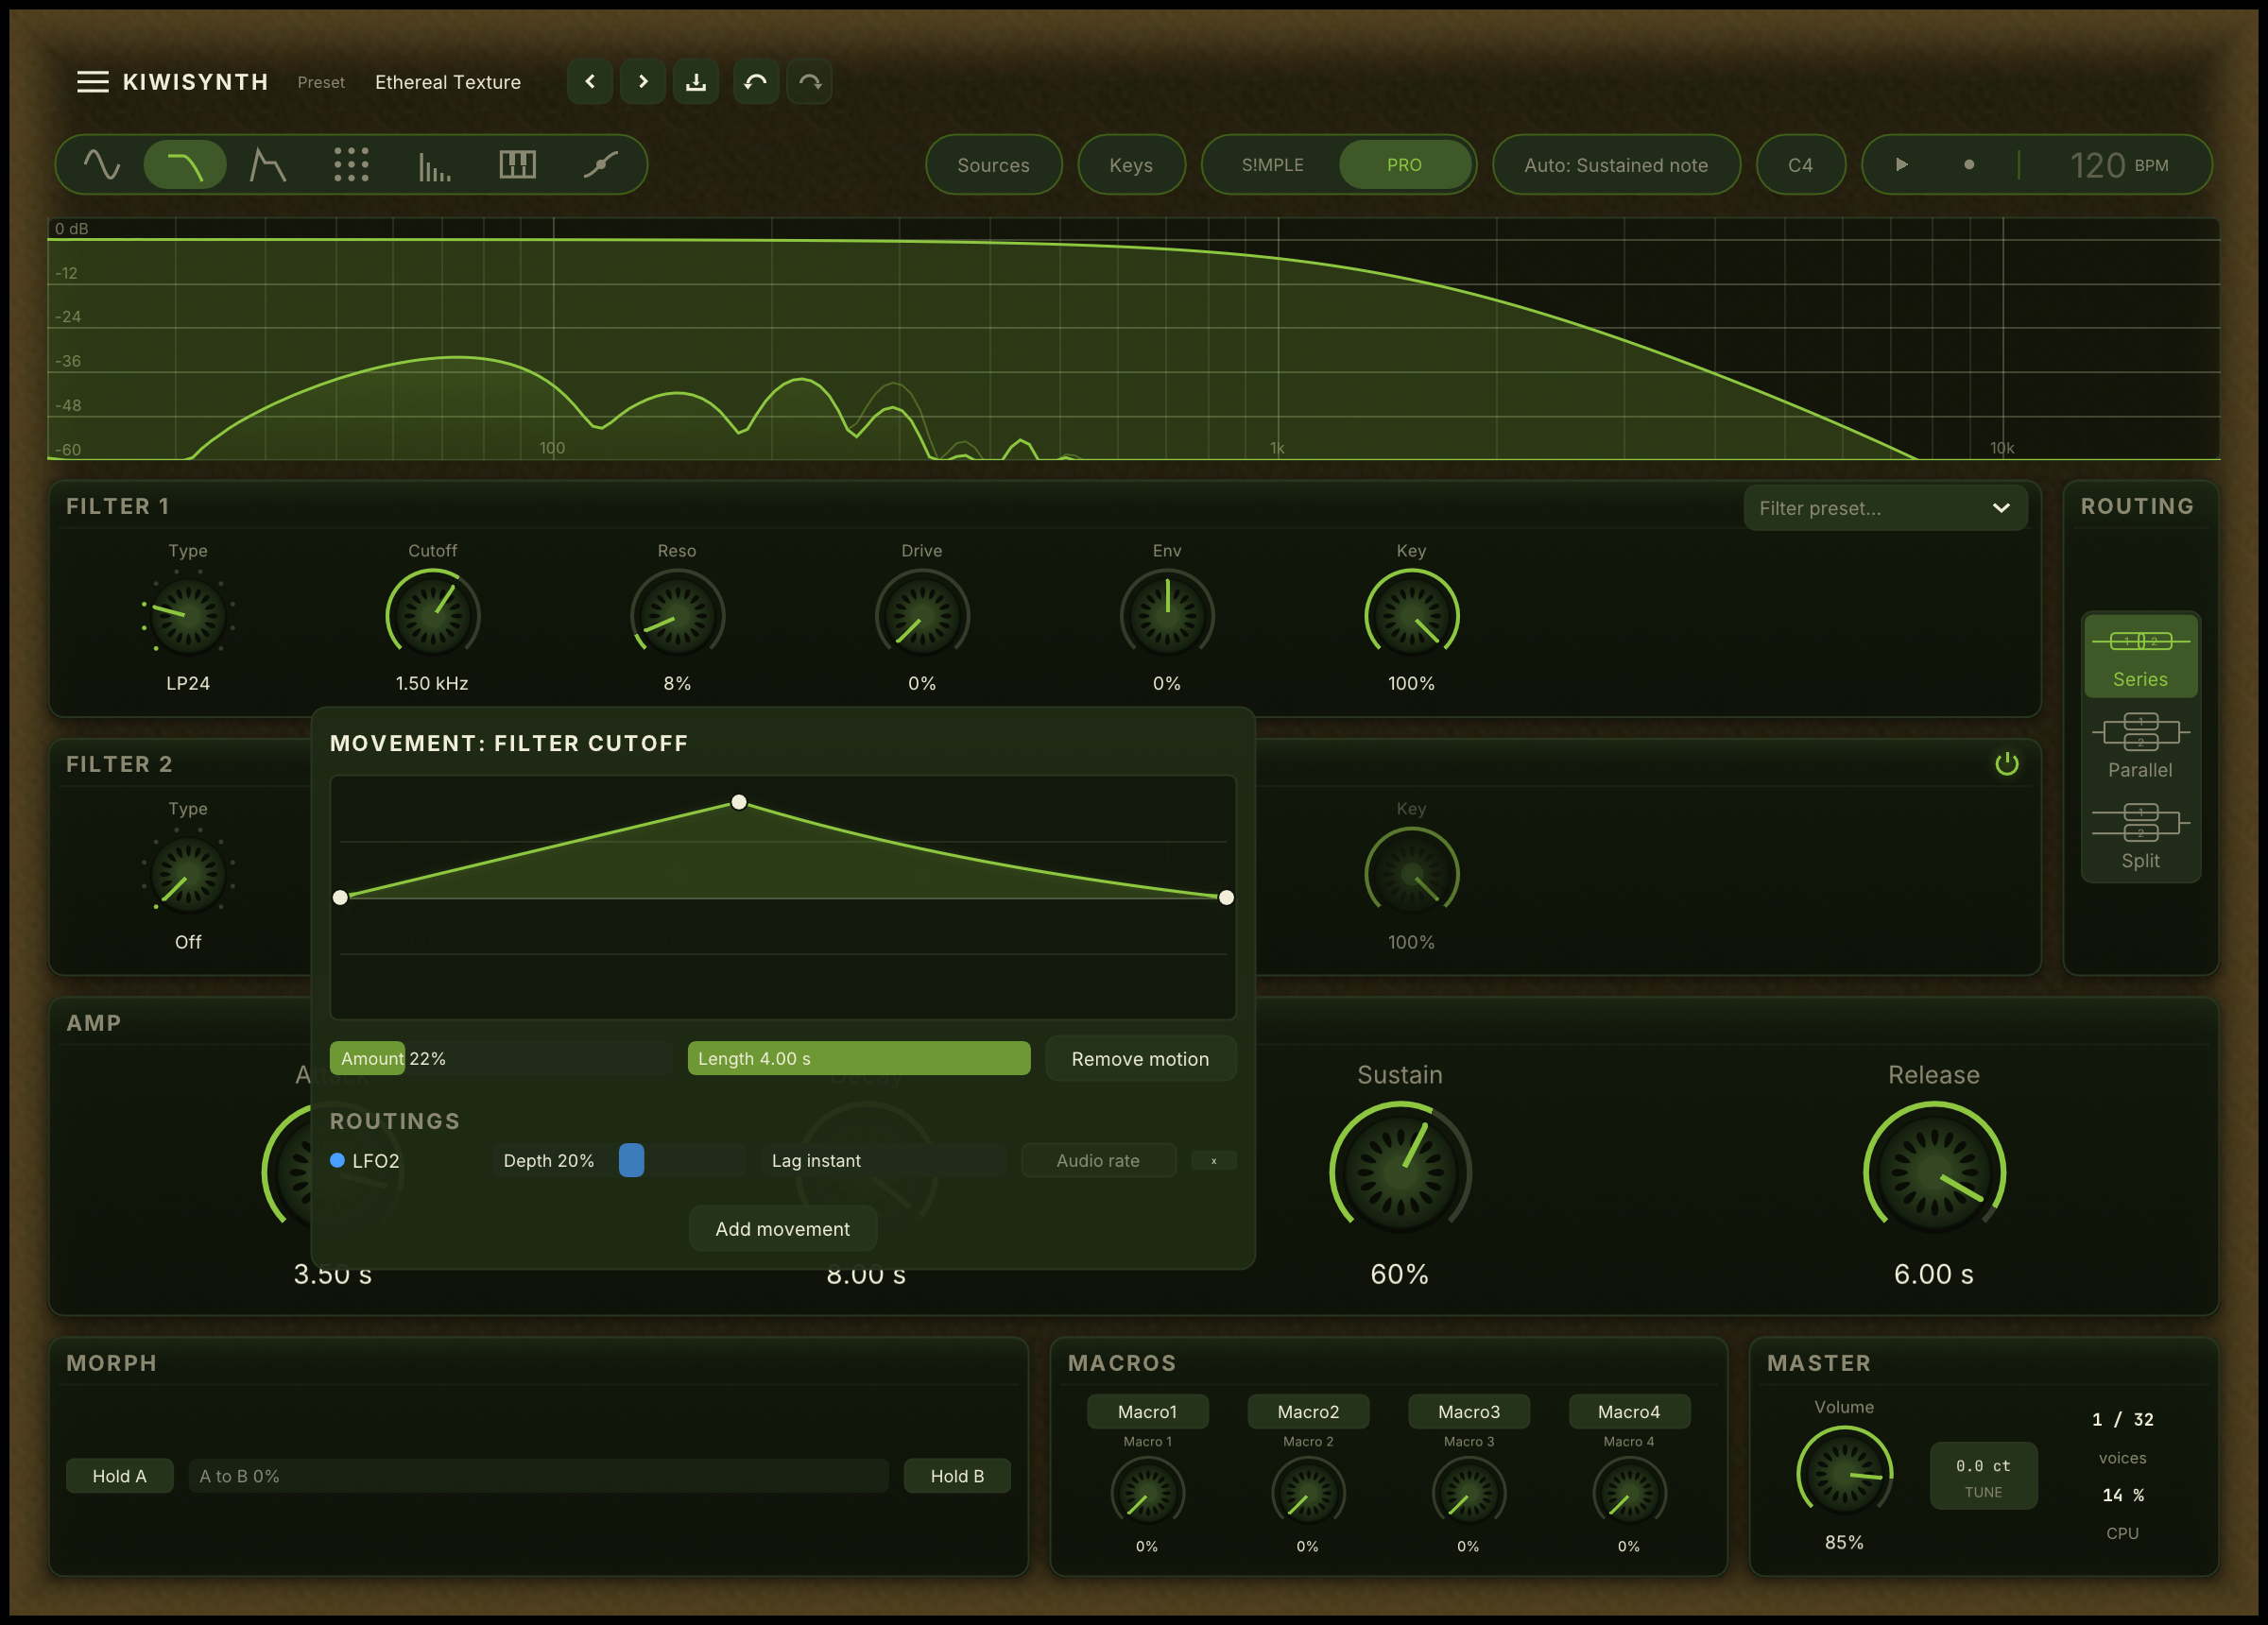
Shape the curve directly:
- click an empty spot to add a point, and drag to place it,
- drag a point to move it in time and depth,
- drag the line between two points to bend that segment,
- double-click a point to remove it.
The first point stays anchored at the start of the note. Below the curve sit two controls:
- Amount: how far the motion deviates from the resting value (its depth).
- Length: how long the motion takes, in seconds. Raise it for a slower, broader evolution, lower it for a quicker one. After the length runs out the contour holds its last value, so a long held note settles.
A button removes the motion and returns the knob to a plain static control. The same editor also lists every modulation source routed into the knob, so the curve you draw and the LFOs or envelopes feeding the control sit together.
What can move
Motion can be attached to the continuous oscillator and filter controls, the ones that carry most of a sound's movement:
- Each oscillator's level, tune, semitone, unison detune and wavetable position.
- The sub and noise levels, and the noise filter frequency.
- Both filters' cutoff, resonance and drive.
- Master Tune, the pitch of the whole voice. Right-click its field in the Master card. A Rise at full Amount glides every key up an octave over the Length and holds it there. Semitone moves in whole steps, so this is the control for a smooth glide.
Structural choices stay fixed for the whole note: the oscillator mode, the filter type, the routing, the warp mode. Motion shapes how a sound moves, not what kind of sound it is.
Motion adds on top of the resting value, and your other modulation still applies: an LFO, envelope or mod-matrix routing on the same control layers on top of the motion. Nothing is overwritten.
The Motion view
The Motion page draws a single note's life on one screen. The upper part shows each sound source (the three oscillators, sub and noise) as a band: its height is pitch, its thickness is detune spread, and its brightness is how loud it is at that moment. Beneath the bands, one lane per moving control traces its value over the same time axis.
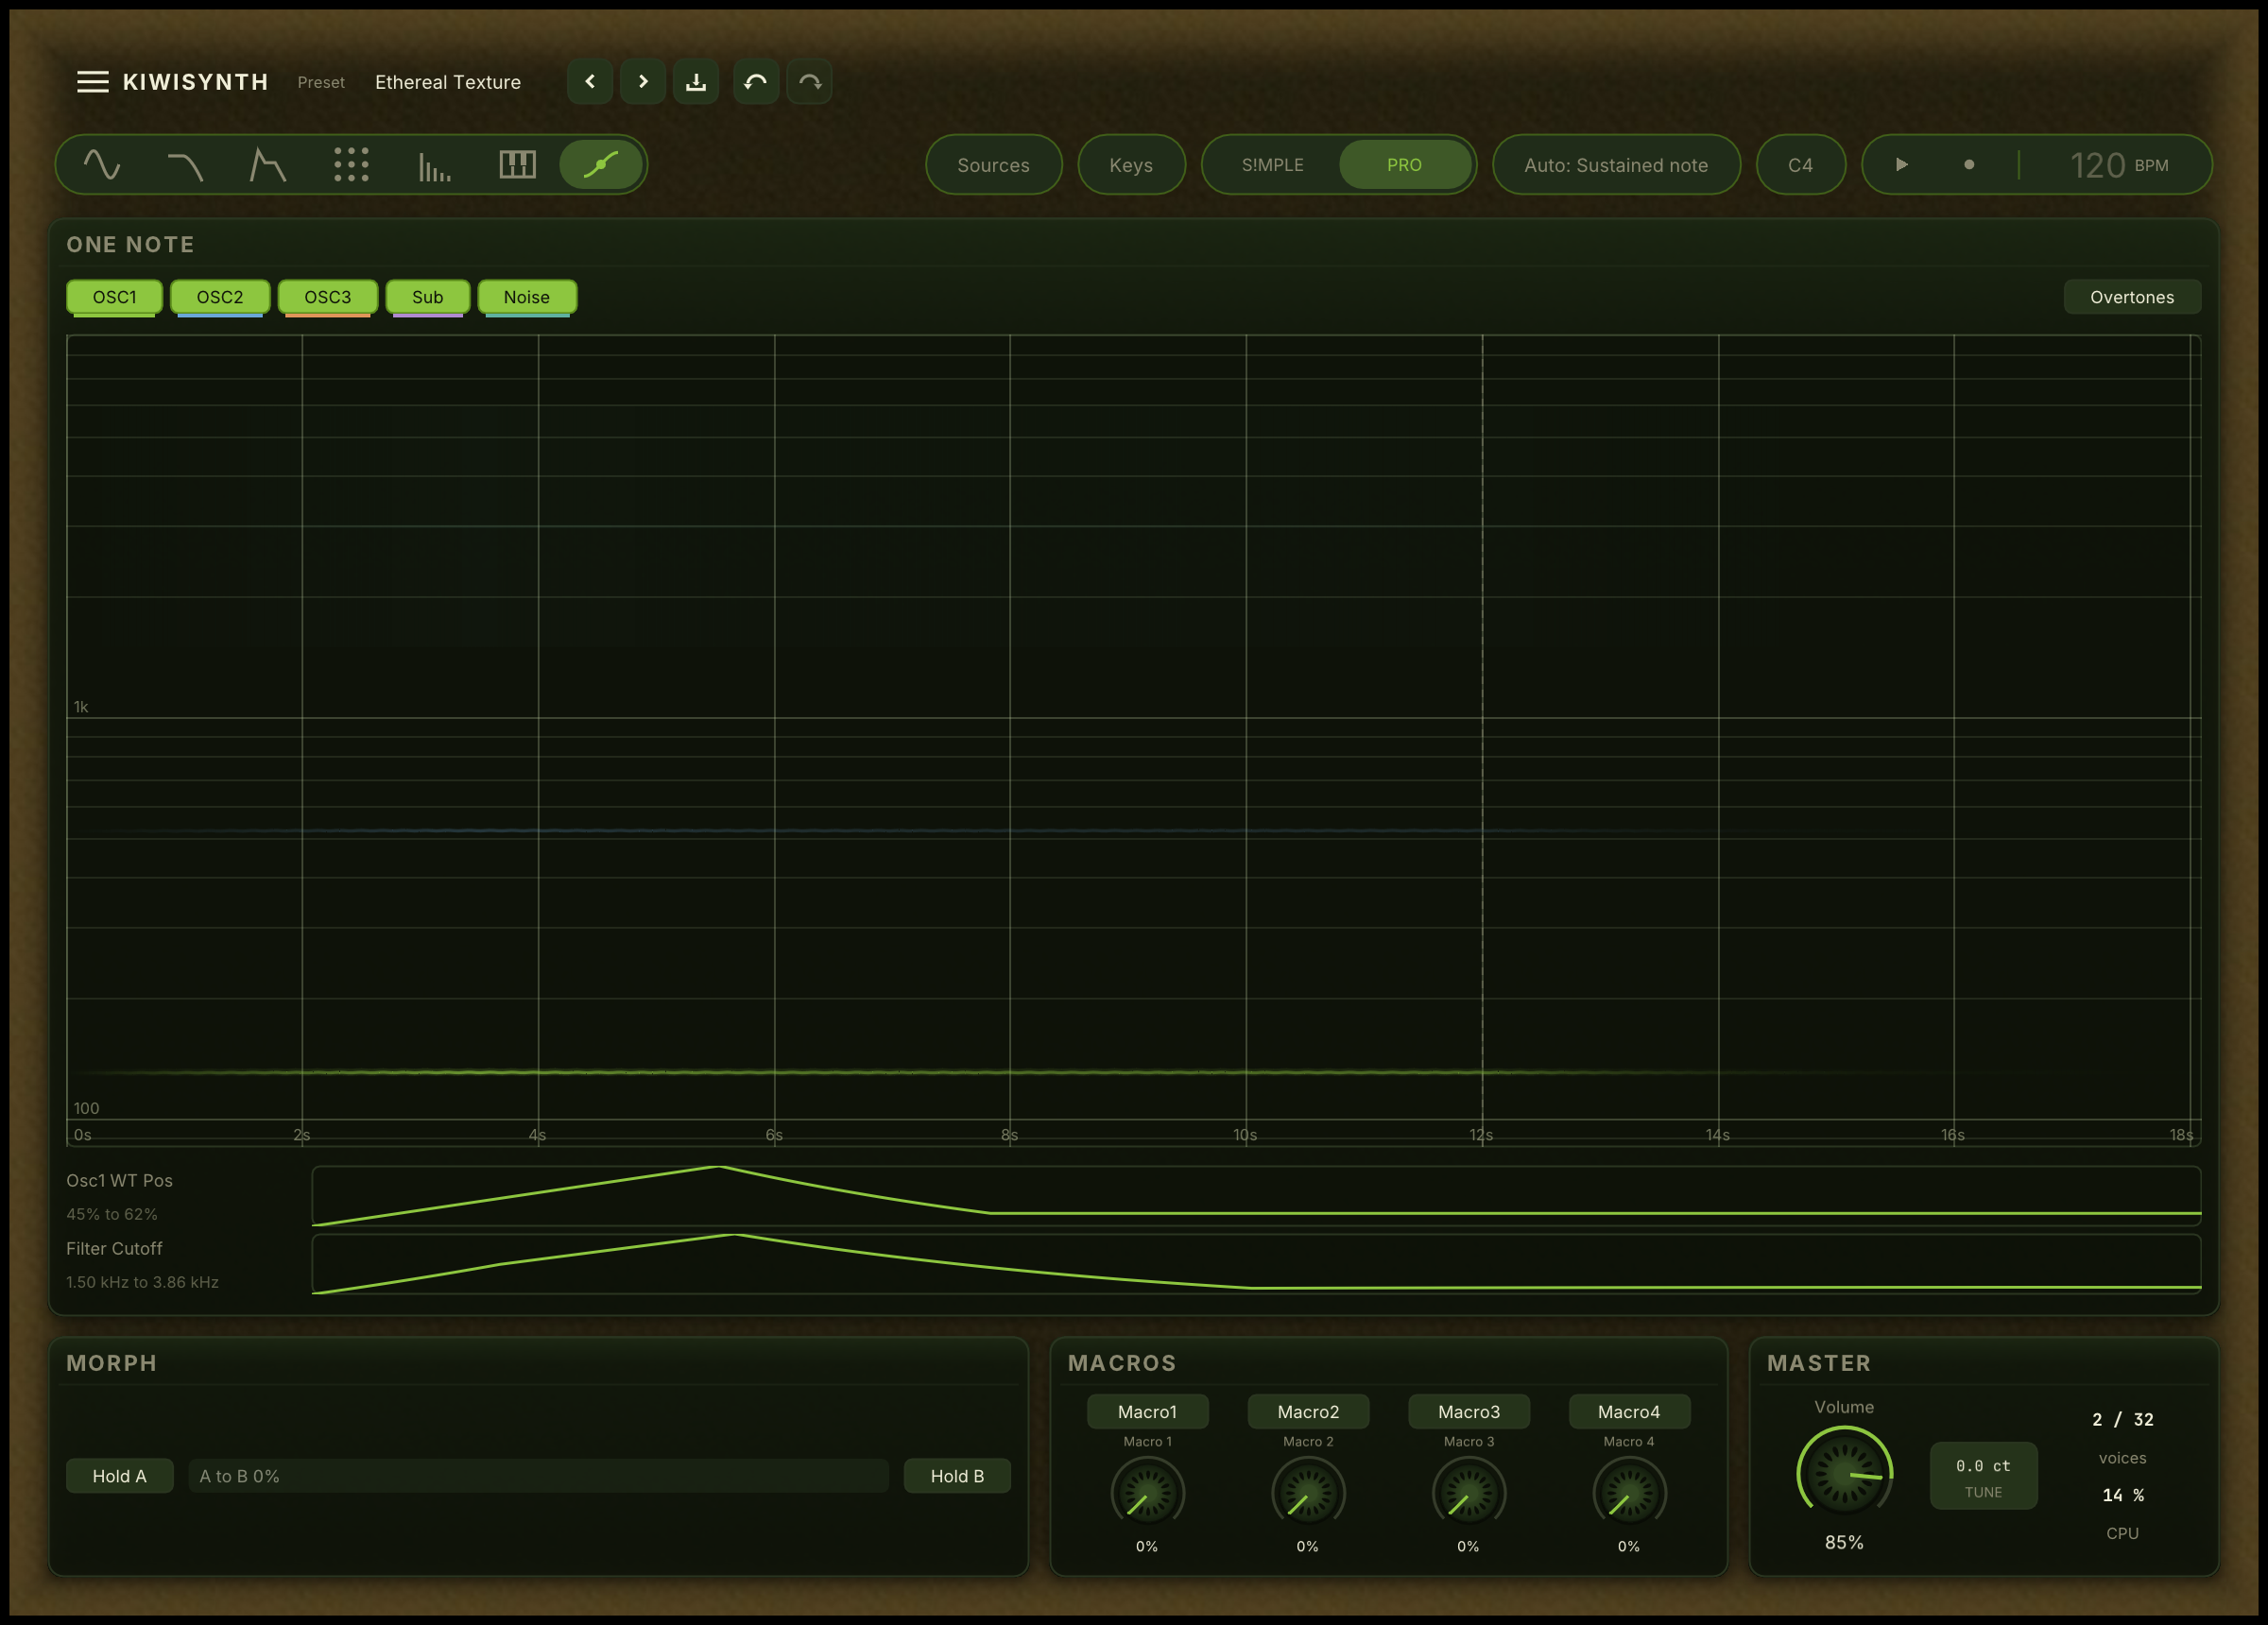
A lane appears for any control that moves during the note, whatever moves it: a contour you drew, a modulation envelope, an LFO in Per-Voice mode, a Bloom source, or the filter envelope. You do not have to remember which mechanism a patch used. A control that stays still gets no lane, so what you see is what changes. The lanes are ordered by how far each control travels, so the most active one is at the top.
Because everything shares one time axis, you can read the timing relationships directly: the filter opens here, the detune widens there, this oscillator fades as that one swells. A dashed line marks where the note is released. This is the one place to see everything that changes a note's timbre over its life.
Two things are left out on purpose. An LFO in Global mode runs continuously whether or not you are playing, so where it happens to sit when a note starts is not a property of the patch; the view shows the patch. Effects after the voices are not drawn either, because they are not part of a single note.
Shape the movement, not just its size
The depth of a modulation says how far a control moves. It does not say when. A patch where everything moves by the same amount from the first instant to the last tends to sound synthetic even when a lot is moving, because nothing arrives and nothing settles.
Three shapes cover most of what an instrument does:
- Widest at the attack, settling. What a plucked or struck sound does: the body is chaotic at the moment it is hit and calms as it rings. Build it with a modulation envelope set to a near-zero attack, a short decay and zero sustain.
- Still at the attack, growing. What a singer does with vibrato, and what a pad is for. Build it with an LFO's Delay and Fade, or with Bloom for something slower.
- Out and back. Build it with a contour on the knob.
You can also make a repeating movement grow or narrow, rather than just switching it on late. See "Make a wobble grow or narrow" in modulation.
Give each movement its own length, and check the result on the Motion view: if two lanes rise and fall together, the ear hears one movement rather than two.
A first motion
To hear the idea, open a filter and let it close again:
- Set the filter cutoff knob to a fairly low resting value.
- Click its ring. The movement editor opens on the cutoff.
- Choose Swell.
- Raise Amount so the sweep is clearly audible, and set Length to around one second. Then drag the peak of the curve to taste.
Hold a note. The filter opens from your resting cutoff, then settles back to it. Open the Motion page to watch the cutoff lane rise and fall against the source bands. Give a small Rise to an oscillator's detune as well, and you will see both lanes move on the same axis, each at its own time.